ReactFlow: Building Intuitive Workflow Visualizations for Non-Technical Users
Why I'm Writing This
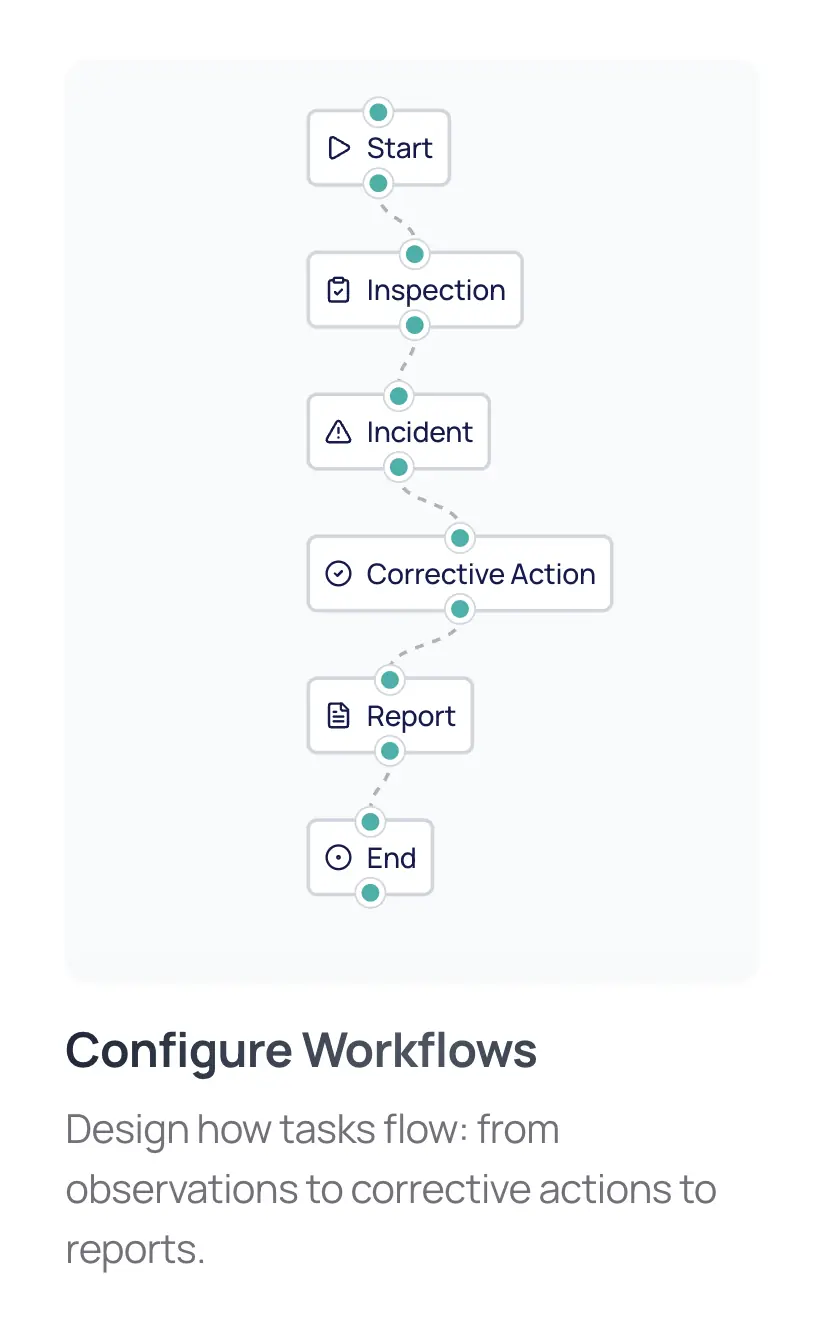
Recently, I faced an interesting challenge while building our marketing website at Capptions. We needed to showcase our Workflow Builder functionality to QHSE (Quality, Health, Safety, and Environment) managers - a user group that spans the spectrum from tech-savvy to non-technical backgrounds. The goal was to make complex workflow concepts accessible and visually appealing - so users understand prior having to sign up.
After exploring other options (plain Tailwind, motion.dev), I landed on ReactFlow, and the journey taught me valuable lessons about technical documentation, user experience, and the art of simplifying complex concepts.
Key Insight: Visualization > Explanation
The main "aha" moment came when I realized that trying to explain workflow builders through text and static images wasn't cutting it. Our users needed something interactive and familiar - something that reflected the actual tool they'd be using.
Deep Dive
Setting Up Custom Nodes
The first challenge was creating custom nodes that felt native to our application. Here's how I approached it:
type CustomNodeData = {
  label: React.ReactNode;
};

const CustomNode = ({ data }: { data: CustomNodeData }) => (
  <div className="relative p-2 bg-white rounded-md border-2 border-gray-300">
    <Handle
      type="target"
      position={Position.Top}
      className="!w-3 !h-3 !bg-primary !border-1 !border-white ring-1 ring-offset-2 ring-gray-300"
    />
    {data.label}
    <Handle
      type="source"
      position={Position.Bottom}
      className="!w-3 !h-3 !bg-primary !border-1 !border-white ring-1 ring-offset-2 ring-gray-300"
    />
  </div>
);
I designed the nodes with a few key principles in mind:
- Clean, minimal styling that matches our UI
- Clear connection points (handles) for visual flow
- Flexible content rendering through React nodes
State Management and Flow Control
The core flow management is surprisingly straightforward with ReactFlow's hooks:
const [nodes, setNodes] = useState<Node[]>(initialNodes);
const [edges, setEdges] = useState(initialEdges);

const onNodesChange = useCallback(
  (changes: NodeChange[]) => setNodes((nds) => applyNodeChanges(changes, nds)),
  [],
);

const onEdgesChange = useCallback(
  (changes: EdgeChange[]) => setEdges((eds) => applyEdgeChanges(changes, eds)),
  [],
);
What I love about this approach is how ReactFlow handles the complex state management internally while exposing a clean API for customization.
Making It Non-Technical User Friendly
Here's where things got interesting. For our QHSC managers, I implemented several UX decisions:
- Locked Navigation: Prevented accidental canvas dragging
<ReactFlow panOnDrag={false} draggable={false} preventScrolling={false} />
- Visual Feedback: Added animated edges to show flow direction
const initialEdges: Edge[] = [
  {
    id: "start-to-inspection",
    source: "start",
    target: "inspection",
    animated: true, // This small detail makes a big difference
  },
  // ...
];
- Intuitive Icons: Used familiar icons for different node types
<div className="flex gap-2 items-center font-medium text-indigo-900">
  <ClipboardCheck className="w-4 h-4" />
  <span>Inspection</span>
</div>
What I'd Do Differently
Looking back, there are a few things I'd approach differently:
-
Start with Mobile-First: While ReactFlow works great on desktop, I should have considered mobile interactions earlier in the development process.
-
More Interactive Elements: I could have added more interactive elements to demonstrate the actual workflow building process, not just the final result.
-
Performance Optimization: For larger workflows, I'd implement virtualization earlier in the development cycle.
The Documentation Inspiration
One unexpected outcome was how much I learned from ReactFlow's documentation. It's a masterclass in technical writing - clear, well-structured, and practical. It inspired me to improve our own documentation with:
- Interactive examples
- Clear, concise code snippets
- Progressive disclosure of complexity
- Practical use cases
Resources
- ReactFlow Documentation
- React Flow Examples
- Lucide Icons - For the workflow icons
- TypeScript React Patterns
Final Thoughts
Building this workflow visualization reminded me that sometimes the best technical solution isn't about showing off complex features - it's about making complex things feel simple. RF definitely helped me bridge the gap between technical capability and user understanding, which is exactly what we needed for our marketing site.
The next time you're faced with explaining complex technical concepts to non-technical users, consider whether a visual, interactive approach might be more effective than traditional documentation or static diagrams.